In this 2-part series, I’m going to demonstrate a non-SPA ASP.NET Core and Webpack integration. We’ll be using Webpack to bundle/minifiy JavaScript code that will supplement the C# “server-rendered” pages in an application.
Part 1 - will focus on setting up Webpack with ASP.NET Core and getting the bundles to the browser.
Part 2 - will comprise of polishing our solution. Allowing for debug bundling at Development time and Minified bundling for Release by looking at ways of reading the Webpack stats.json file and extracting bundle information.
What are we trying to achieve?
If you’re looking to use Webpack within a Single Page Application (SPA) then you’ll want to go and use ASP.NET JavaScript Services.
If, however, you’ve got a “server rendered” application (e.g. your pages are built using C# Razor .cshtml files), then this post is for you.
What is Webpack?
Webpack takes front-end modules (code, css/sass, images etc) and bundles them as static assets for serving to the browser.
Webpack takes modules with dependencies and generates static assets representing those modules
Isn’t there other stuff that can do that?
Yes, there is. Gulp/Grunt are mature task runners, which have a huge amount of plugins which will take all your front-end code and output some .js files for you.
In the ASP.NET Core world, we have access to a “built-in” Bundler. This is great to get us started, however I feel it’s a bit crude and doesn’t have all tooling/plugins which are available in Webpack.
Using Webpack, we’re going to create a JavaScript file for each page, which is also going to be accompanied by a “common code” JavaScript file (vendor.js). Once we’re ready to deploy the code, Webpack can Minify and Tree-shake the “dead” (unused) code away - making our bundles even leaner.
Why Webpack then?
Well, Webpack really shines when it comes to Code Splitting
From the site:
This feature allows you to split your code into various bundles which can then be loaded on demand or in parallel. It can be used to achieve smaller bundles and control resource load prioritization which, if used correctly, can have a major impact on load time.
In short, unused code doen’t end up in bundles where it’s not needed…………Very VERY handy! And can be loaded on demand, not just when the page is rendered by the browser.
The Code
As with most of my posts you can find the code at the following url:
https://github.com/ry8806/ASPNETCore_Webpack
Installing Webpack
Setup an empty ASP.NET Core MVC project. Open up the command line and get into the same directory as the .csproj you just created and run the following npm install command
npm install --save-dev webpack
This will create an entry in your package.json under the dev-dependencies for Webpack.
This will take a short while to install.
If you’re also wanting to work in TypeScript, you’ll need to install the “ts-loader” for Webpack, this ensures Webpack can parse your TypeScript code. You’ll need the TypeScript npm package too.
run the following npm install commands
npm install --save-dev typescript
npm install --save-dev ts-loader
For TypeScript you’ll need a tsconfig.json file. Add one of these with your project’s options and continue.
Here’s a minimal tsconfig to get you started
{
    "compilerOptions": {
        "sourceMap": true
    }
}
As we’ll be letting Webpack take control of our TypeScript compilation, we’ll have to tell Visual Studio to not compile the TypeScript.
Add the following line to the first <PropertyGroup> in the .csproj file
<TypeScriptCompileBlocked>true</TypeScriptCompileBlocked>Writing some code
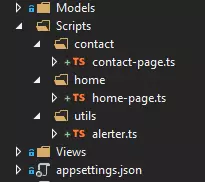
Let’s write some code so that we can “Webpack” it. I’m going to write 3 JavaScript files. One will be a common “Utils” file. Then the remaining two, one will be for the home page and one for the contact page.
I personally create a Scripts folder in the root of my Web Application and logically group all my front-end code in there. You can do as you wish, just remember if you deviate, the paths to files will be different later on in the post.
The .ts/.js files created for a page are called “Entry Points” in Webpack.
Configuring Webpack
Now we’re going to configure Webpack. I use TypeScript as my front-end language. If you don’t, then just ignore the TypeScript specific steps.
Create a file webpack.config.js in the root of your Web Application.
Here is the basic configuration we’ll use for this Part 1 (in Part 2 - we’ll get clever with minification)
const path = require('path');
var webpack = require("webpack");

module.exports = {
    entry: {
        // Output a "home.js" file from the "home-page.ts" file
        home: './Scripts/home/home-page.ts',
        // Output a "contact.js" file from the "contact-page.ts" file
        contact: './Scripts/contact/contact-page.ts'
    },
    // Make sure Webpack picks up the .ts files
    resolve: {
        extensions: [".ts"]
    },
    module: {
        rules: [
            {
                test: /\.tsx?$/,
                loader: 'ts-loader',
                exclude: /node_modules/,
            }
        ]
    },
    plugins: [
        // Use a plugin which will move all common code into a "vendor" file
        new webpack.optimize.CommonsChunkPlugin({
            name: 'vendor'
        })
    ],
    output: {
        // The format for the outputted files
        filename: '[name].js',
        // Put the files in "wwwroot/js/"
        path: path.resolve(__dirname, 'wwwroot/js/')
    }
};
Now we’ve setup our Webpack configuration for our ASP.NET Core Web Application. We need to run Webpack on our Scripts.
To do this I’m going to use NPM scripts. We could easily use Gulp/Grunt to run Webpack, however we’ve got NPM installed already and it’s how the Webpack docs recommend you run Webpack!
Open your package.json file (basically an NPM manifest) and insert the following JSON section underneath “devDependencies”
{
  "scripts": {
    "build:dev": "webpack --display-error-details --watch"
  }
}
This defines a script called build:dev which runs Webpack with the options --display-error-details (tell us what’s wrong) and --watch (keep watching the files for changes and run again if they do change)
Running Webpack
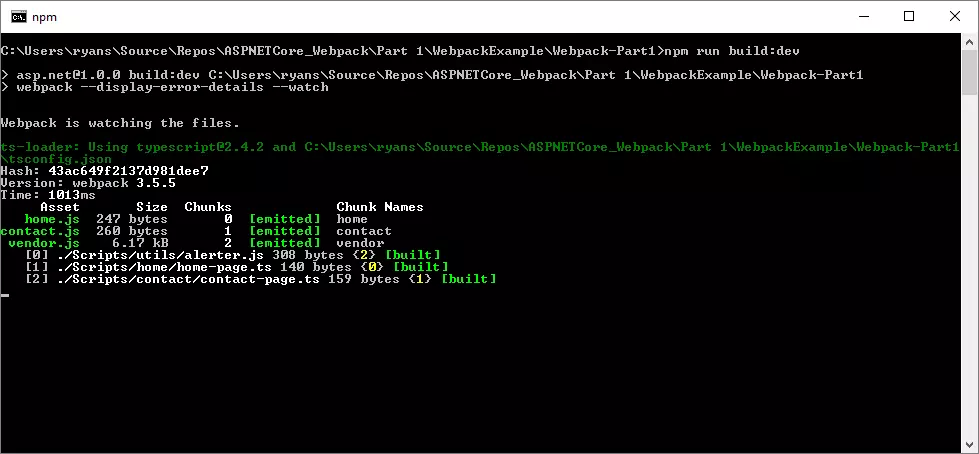
Run Webpack by opening a command window in the root of your Web Application folder and type the following command
npm run build:dev
………..and………..you’re done
Webpack will do an initial run through, then every time you update one of your source files, it’ll do it again.
Here is a screen-grab of the running Webpack command window
Integrating with ASP.NET Core
Now we’ll need to start including the outputted script files in our Views in ASP.NET Core.
Firstly as our vendor.js is a “Common Chunk”, we’ll include this on every page. (Obviously if you have pages which do no require JavaScript then you can turn include this .js file as you see fit)
Insert the following Script tag into _Layout.cshtml
<script src="~/js/vendor.js"></script>Next up, we’ll need to include the specific js file for each page.
So for Views > Home > Index.cshtml insert the following Scripts section at the bottom of the page
@section Scripts {
    <script src="~/js/home.js"></script>
}
For Views > Contact > Index.cshtml insert the following Scripts section at the bottom of the page
@section Scripts {
    <script src="~/js/contact.js"></script>
}
Now run the Web Application and you should see the following on the Home page:
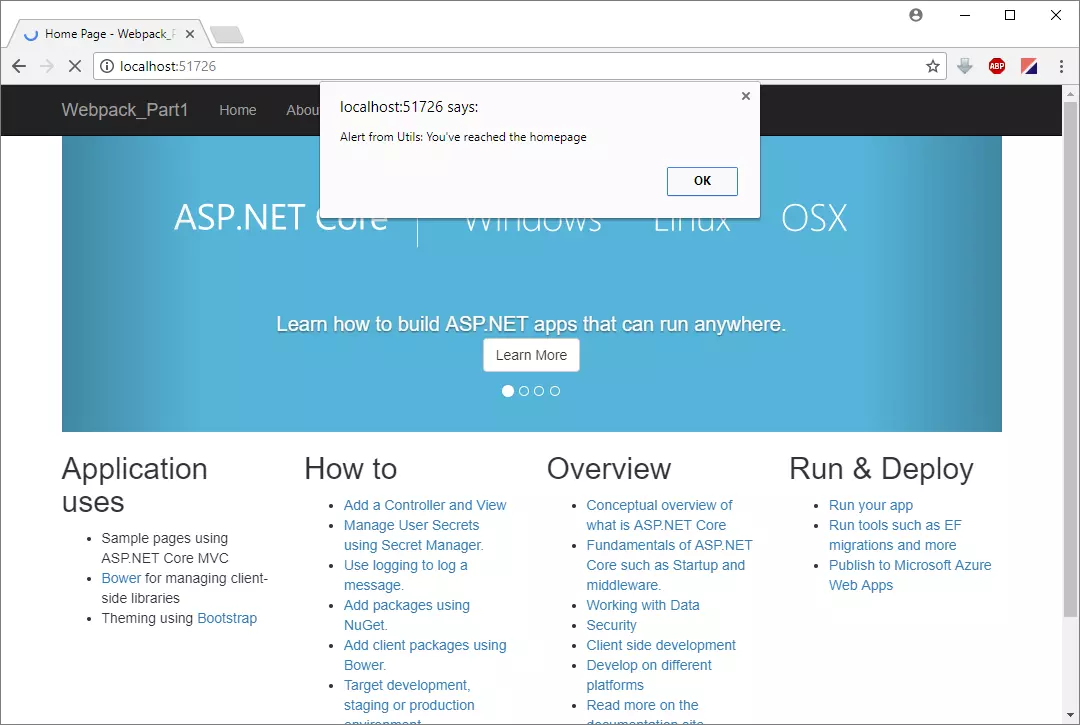
Checking the F12 Dev Tools will show you two js files downloaded to the browser vendor.js and home.js
Congratulations, you’ve just successfully used Webpack to Bundle your scripts and served them up from ASP.NET Core.
Next Up
What we’ll cover in Part 2:
- “dev” and “release” Webpack builds
- browser cache busting using dynamic filenames (with hashes)
- ASP.NET Core - including these files (with hashes) at runtime in
scripttags
Hope you’ve enjoyed this post, stay tuned for Part 2!
If you’ve got any questions/comments leave them below or on Twitter
- Previous
ASP.NET Core MVC - Common Components/(Partial)Views across applications - Next
ASP.NET Core and Webpack - Part 2